Let There Be Hops: Brewing a Beer With Continuous Hop Additions
When it comes to the world of home brewing, hop selection and use tends to rank among the biggest decisions for any batch of beer. Questions such as: "Am I using enough?" or the even more rare "Am I using too much?" seem to run through our minds while we formulate our perfect recipes.
When I got into homebrewing two years ago, I was the typical new brewer. I wanted to make beer that tasted like my favorite beer off the shelf. Terms like hop utilization, mash efficiencies, and wort were all a foreign language to me. I also tended to shy away from the more hop loaded IPAs which have become a lot more popular and available to the general consumer. In those first few tenuous batches, I was trying my hardest not to screw anything up and make drinkable beer.
Two years and several paychecks later, I am brewing with an all-grain system. I have read and enjoyed many brewing books (John Palmer's How to Brew, Brewing Classic Styles by Jamil Zainasheff and John Palmer, and The Brew Masters Bible by Stephen Synder). I have spent hours deconstructing my process to fine-tune every aspect to ensure quality outcomes.
Earlier this year I decided to try something a little different. I wanted to brew a different style of beer every brew day; not just the tried and true recipes, but also ones I formulated using BJCP guidelines, a little creativity, and what I knew I could be successful with.
Now, IPAs were never my thing. I found them to be pretty harsh on the palate and overwhelming to the nose. But wanting to give it an honest try, I dove into my research for the style headfirst. I went to my local package store and bought twelve of their IPAs off the shelf. Everything from Terrapin, Dogfish Head, Victory, Stone, Sweetwater, Cigar City, Due South, and Bells, just to name a few). I immersed myself in the world of hops. APA, IPA, IIPA, West Coast, East Coast, Belgian, Black, and White... I didn't spare one.
Throughout my research I tried over 30 different IPAs, searching for a profile I liked best. I found I liked the malt sweetness and smooth mouth feel associated with East Coast IPAs, but also liked the crisp bite of a West Coast IPA. I was torn... which side should I choose? Being from Florida, I love citrus fruits, and I knew I wanted to make an IPA that captured the crisp fresh taste of the grapefruit, oranges, and pineapples I grow in my backyard. I also wanted something that was well balanced, with some malt sweetness to make it refreshing and not as drying as a West Coast IPA.
I finally had my goal: I wanted to brew an American East Coast IPA. I wanted to make a beer that could be enjoyed for its balance and unique rounded hop profile. I didn't want a beer that would garner a t-shirt saying, "I survived xxx hop bomb! 200 IBU." Using what I knew from Brewing Classic Style,s I selected my base malts: American 2-row, some Vienna for some smoothness, and some Crystal 40 for color and that sweet kick. The yeast I would select would be a tried and true favorite, Wyeast 1272 American Ale 2, which I knew I could ferment without issues.
Now the biggest decision was what were my hops going to be? How am I going to add them to my brew? In what order?
I began searching forums - BYO, AHA, r/homebrewing, and Homebrew Talk. I read everything I could about building a hop schedule. I found many do a bittering addition at the start of the boil, a 30 or 20 minute addition, then some hops at flame out, and maybe a hop stand if they were feeling it. Many chose hops that had similar characteristics. In my case I wanted citrus and a little of that pine nose that I often smelled in the IPAs I sampled. I decided a mix of Centennial, Cascade, and Amarillo would be my boil additions, but I still didn't know how I was going to add them, and in what interval.
I plugged some numbers into the Brewers Friend IBU calculator, and figured I wanted to end up between 55-70 IBU. But timing and dosing still were making me nervous about the potential disaster I could unleash. Then I started recalling the beers I've tasted. The one that was very unique to me, that captured the essence of the hops without being overbearing, was the Dogfish Head 60 Minute IPA. So going back to that beer, I found that the concept behind their 60, 90, and 120 IPAs was a practice called "continual hopping" - adding hops through the entire boil in a continuous way.
A new problem arose... how do I as a home brewer anticipate the result of the hops I add? I did some digging, and there seemed to be several schools of thought. One suggestion was figuring the individual IBU contributions of each addition. One was adding a pellet at a time. One even suggested using hop extract and a sophisticated Raspberry PI run machine that extruded a continuous hop drip. Needless to say, I may have in over my head...
I sat on the idea for a couple weeks, and did some more research into hop utilization and how it was affected by boil time. Utilization I found is a direct proportion to time: the longer the hop is boiled, the more alpha acids that are released into the wort, whereas later additions were lower in alpha acids and more for aromatics. Late hop additions didn't contribute a lot of bitterness, hence the popularity with adding a ton of hops toward the end (hop bursting/ hop stands).
So, could I continuously hop without imparting extreme bitterness? And what would my starting additions look like in comparison to my ending additions?
After researching a little more I found a formula online from Homebrewtalk.com user Rocketman768. This was a great tool for estimating total IBUs based on a continuous addition of hops.
K:=1.65*0.000125^(SG-1)*AA*1000/(4.15*V)
IBU_C= K*h*[1-1/(0.04*T)*(1-exp(-0.04*T))]
SG is specific gravity, AA is average alpha acid value in a percentage, V is the final volume in liters, H is the weight of hops in grams, and T is the time you are continually hopping.
By using this formula and programming it into a spreadsheet, I was able to play with the variables until I ended at a value I was comfortable with. With 2oz Centennial, 1oz Cascade, and 1oz Amarillo, I could end up with a total IBU of 68 for a 60 minute boil.
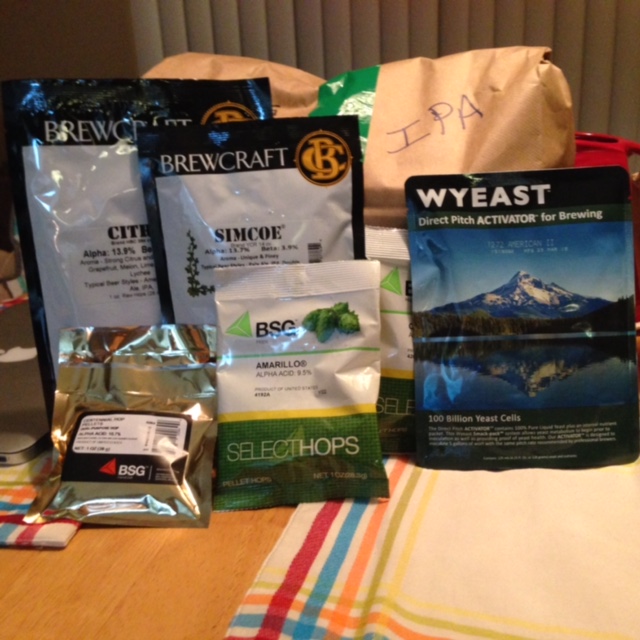
Recipe ingredients - featuring hops, hops, and more hops!
Now another question... knowing that bitterness derived from alpha acids is highly influenced by time, what would each addition need to look like so that I don't add too much too early?
The night before my brew day, I sat down to put a final hop schedule together. This beer would be done in time for my 30th birthday in early July, so I figured 30 hop additions would be a very poetic way to do my hop schedule. I would be adding hops every two minutes from start of boil to flame out, so I sat down with an individual IBU calculator and my hop selection.
Weighing hop pellets or pieces would not give me as precise a measurement as I needed, so taking some advice from a BYO article, I pulverized the hop pellets and mixed the powder of all three hops together. My thoughts on this were that I would be utilizing each of the hops unique characteristics for the entire boil, not just for bittering or aroma - each hop would be a star in this brew. I then calculated my 30 hop additions, each addition I wanted to be about 2.3 IBU, which meant that my early additions would be much smaller than my late addition. So I plugged in each addition and logged the IBU contribution of each using the average alpha acid content of my hop "mixture" as my guide for the IBUs (note: by mixing the hops it is hard to tell how much of any particular hop was in each addition, but I mixed as evenly as possible to give the best representation for each sample).
Brew day came, and I set up my 30 individual hop additions. I used small 4oz cups for each addition and marked each for time in the boil. I threw in my whirlfloc tab with my 10 min addition, and I started my mash. I didn’t do any water adjustments other than adding some KMET to rid the water of chloramine; the water for my area has a good amount of sulfates without gypsum additions, so I didn't bother to do anything additional.
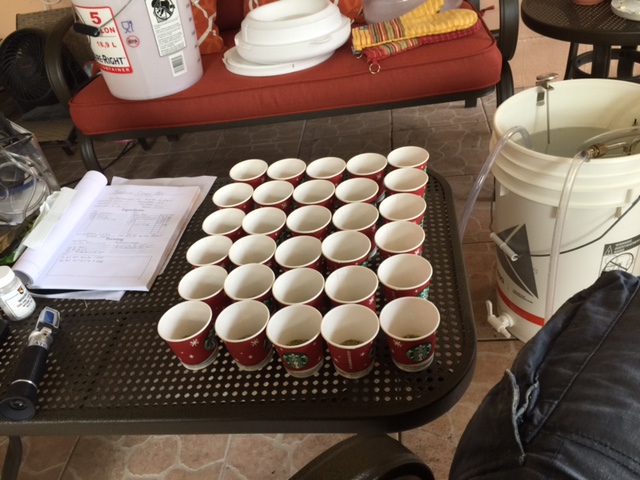
Continuous hopping in thirty hop additions.
After I mashed out, I started my boil. I anticipated that hot break with a mix of excitement and trepidation, knowing I would be spending a while next to that kettle. The hot break came and went and I started my additions. Utilizing a timer with memory, I set it for 2 minute intervals, and began timing each addition. The brew went very smoothly, adding hops every time that alarm went off. I swear... I still hear it. Before I knew it, it was time to chill the wort and get it into the fermenter.
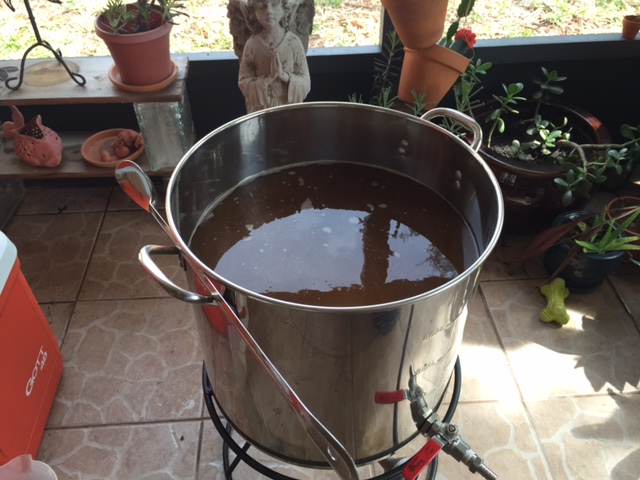
Boiling wort
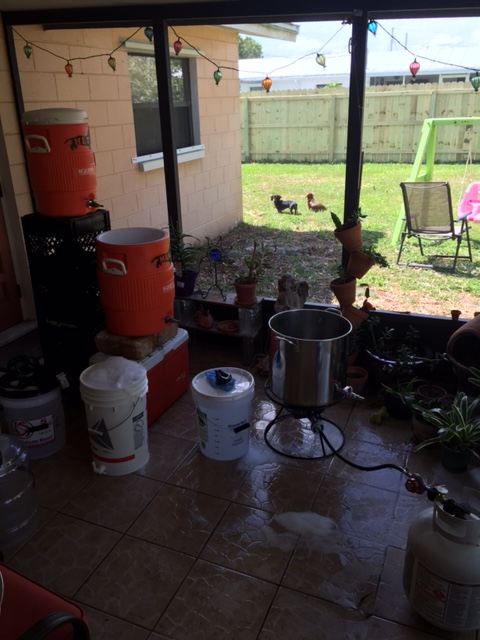
My equipment setup
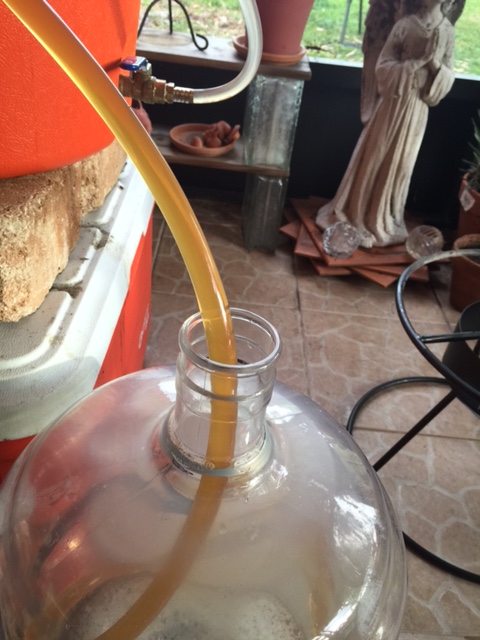
Racking to the carboy.
After I oxygenated the wort, I set my fermentation chamber to 64 degrees F and let the beer slide down to pitching temp. I read in my research that the yeast strain I was using would enhance citrus flavors at the lower end of the temperature range, so there it sat for two weeks of primary fermentation. On the morning of the 15th day, I headed out to the fermentation chamber dry hops in hand. I decided to use 1oz of each Citra and Simcoe, as I wanted that hop aroma - but didn’t necessarily want to smell it 20 feet away. I added my dry hops to the primary and buttoned it back up. The next seven days went by quickly, and I cold crashed the fermented beer on the last day of the week.
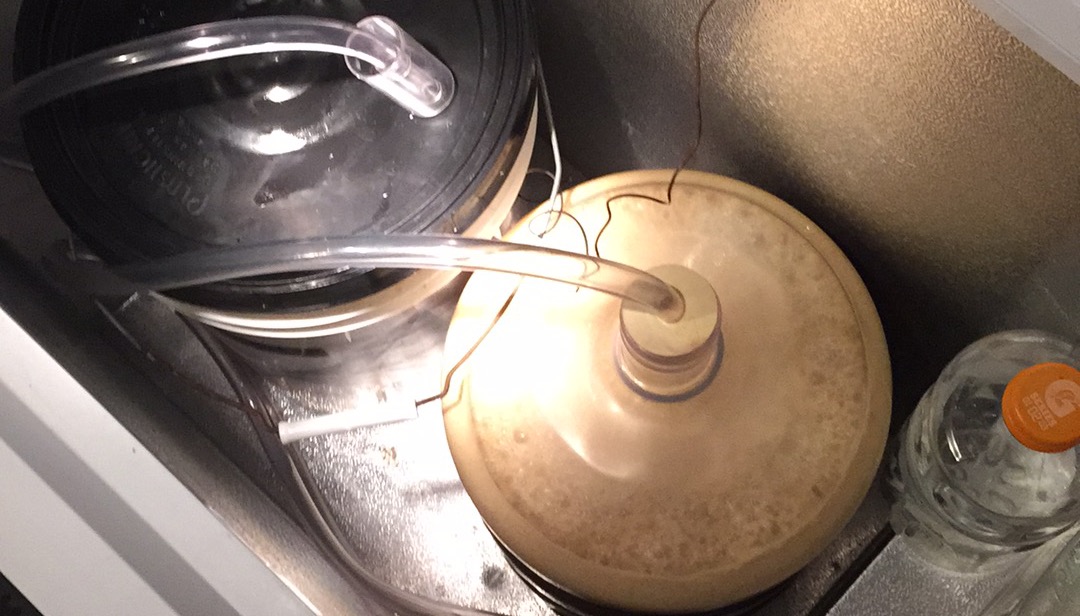
Happily fermenting beer
Bottling day was exciting, as I got to see the clarity of the finished product... as well as taste some of the uncarbonated greatness that was my first IPA. It had a decidedly citrus flavor, with hints of juicy pineapple. Sweetness was very prominent, but I knew that carbonation would subdue most of that.
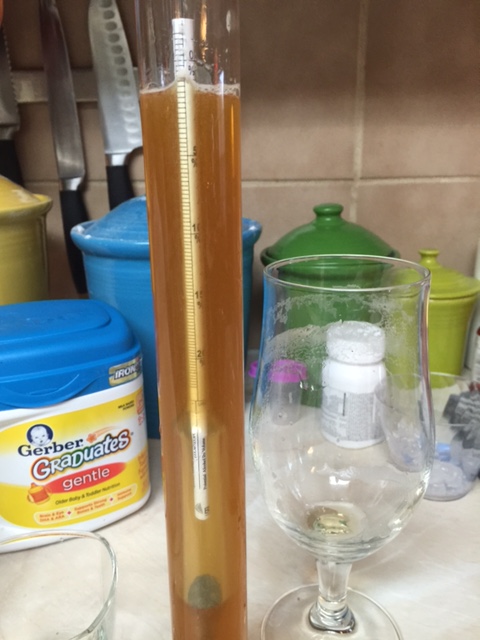
Final gravity reading
Four weeks of bottle conditioning later, I cracked open my first bottle. It poured a dark copper, and a white velvety head was prominent in the glass... at least it carbonated well. I took my first whiff on the brew... hints of pine with the over arcing smell of fresh grapefruit! The first sip, sweet malts that turn to a pronounced hop bitterness, ending in a crisp hop bite at the end that lingered just long enough for you to take that next sip. The fullness of the hop profiles really came out. Flavors of oranges, grapefruit, and pineapple all meshed together harmoniously. It was balanced and smooth, just what I wanted. I felt like Dr. Frankenstein after giving his creation life. I lifted my glass proclaiming, "It's a Beer! It's a Beer!"
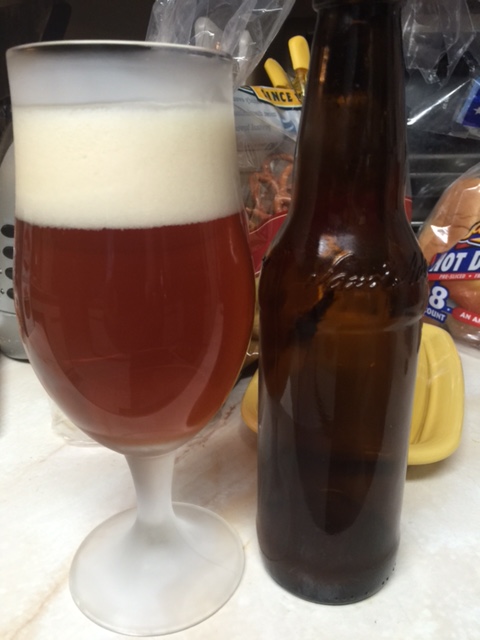
My IPA - it's a beer!
In a similar method, Jsmith82 from Homebrewtalk.com did a comparison on continuous hopping versus traditional hopping; the results of his experiment mirrored that of mine. By utilizing the hops throughout the boil, the hop flavor, aroma, and bitterness were all very balanced. It allowed each hop to show its bittering potential, its aromatics, and its flavor potency. This really solidified my views that hops aren't necessarily type cast as a certain type of boil addition, you can adjust times like many other attributes to serve your tastes. You can be a little crazy and make a complete monster, or make something delicate and smooth. After all, we are home brewers, we can afford to be curious!
I look forward to experimenting more with continuous hopping. I can change so many attributes that can widely change the character of my beers. I can add more additions, take away some, scale it up or down in overall IBU... the list goes on. If there is one thing I may do differently next time, it would be to enlist a few buddies to help me out with those hop additions! But for now, I reflect and look on to my next batch... maybe a Belgian Dubbel, maybe a Scottish Ale, maybe a continuously hopped Red Ale! It’s time to experiment!
Cheers,
Brian
Share this recipe on reddit
Permalink
Tags for this post: IPA, continuously, hopped, continuous, hops, beer, brewing
4 Comments
Any Questions? I'll be happy to answer any thing you may be curious about!
posted by Buxman14 on 6/19/2015 at 05:55:07 PM
Excellent write up, and that beer looks amazing! I might have to try this approach sometime. Question - how did you crush up the hops, just smoosh 'em with a rolling pin or something?
posted by MrDustpan on 7/13/2015 at 02:54:06 PM
To crush up the good I used a mortar and pestle, however a rolling pin or mallet could work as well. I found using the mortar and pestle gave me a more uniform crush so it blended better! Cheers!
posted by Buxman14 on 7/16/2015 at 11:38:48 AM
To crush up the hops I used a mortar and pestle, however a rolling pin or mallet could work as well. I found using the mortar and pestle gave me a more uniform crush so it blended better! Cheers!
posted by Buxman14 on 7/16/2015 at 11:39:40 AM
When I got into homebrewing two years ago, I was the typical new brewer. I wanted to make beer that tasted like my favorite beer off the shelf. Terms like hop utilization, mash efficiencies, and wort were all a foreign language to me. I also tended to shy away from the more hop loaded IPAs which have become a lot more popular and available to the general consumer. In those first few tenuous batches, I was trying my hardest not to screw anything up and make drinkable beer.
Two years and several paychecks later, I am brewing with an all-grain system. I have read and enjoyed many brewing books (John Palmer's How to Brew, Brewing Classic Styles by Jamil Zainasheff and John Palmer, and The Brew Masters Bible by Stephen Synder). I have spent hours deconstructing my process to fine-tune every aspect to ensure quality outcomes.
Earlier this year I decided to try something a little different. I wanted to brew a different style of beer every brew day; not just the tried and true recipes, but also ones I formulated using BJCP guidelines, a little creativity, and what I knew I could be successful with.
Now, IPAs were never my thing. I found them to be pretty harsh on the palate and overwhelming to the nose. But wanting to give it an honest try, I dove into my research for the style headfirst. I went to my local package store and bought twelve of their IPAs off the shelf. Everything from Terrapin, Dogfish Head, Victory, Stone, Sweetwater, Cigar City, Due South, and Bells, just to name a few). I immersed myself in the world of hops. APA, IPA, IIPA, West Coast, East Coast, Belgian, Black, and White... I didn't spare one.
Throughout my research I tried over 30 different IPAs, searching for a profile I liked best. I found I liked the malt sweetness and smooth mouth feel associated with East Coast IPAs, but also liked the crisp bite of a West Coast IPA. I was torn... which side should I choose? Being from Florida, I love citrus fruits, and I knew I wanted to make an IPA that captured the crisp fresh taste of the grapefruit, oranges, and pineapples I grow in my backyard. I also wanted something that was well balanced, with some malt sweetness to make it refreshing and not as drying as a West Coast IPA.
I finally had my goal: I wanted to brew an American East Coast IPA. I wanted to make a beer that could be enjoyed for its balance and unique rounded hop profile. I didn't want a beer that would garner a t-shirt saying, "I survived xxx hop bomb! 200 IBU." Using what I knew from Brewing Classic Style,s I selected my base malts: American 2-row, some Vienna for some smoothness, and some Crystal 40 for color and that sweet kick. The yeast I would select would be a tried and true favorite, Wyeast 1272 American Ale 2, which I knew I could ferment without issues.
Now the biggest decision was what were my hops going to be? How am I going to add them to my brew? In what order?
I began searching forums - BYO, AHA, r/homebrewing, and Homebrew Talk. I read everything I could about building a hop schedule. I found many do a bittering addition at the start of the boil, a 30 or 20 minute addition, then some hops at flame out, and maybe a hop stand if they were feeling it. Many chose hops that had similar characteristics. In my case I wanted citrus and a little of that pine nose that I often smelled in the IPAs I sampled. I decided a mix of Centennial, Cascade, and Amarillo would be my boil additions, but I still didn't know how I was going to add them, and in what interval.
I plugged some numbers into the Brewers Friend IBU calculator, and figured I wanted to end up between 55-70 IBU. But timing and dosing still were making me nervous about the potential disaster I could unleash. Then I started recalling the beers I've tasted. The one that was very unique to me, that captured the essence of the hops without being overbearing, was the Dogfish Head 60 Minute IPA. So going back to that beer, I found that the concept behind their 60, 90, and 120 IPAs was a practice called "continual hopping" - adding hops through the entire boil in a continuous way.
A new problem arose... how do I as a home brewer anticipate the result of the hops I add? I did some digging, and there seemed to be several schools of thought. One suggestion was figuring the individual IBU contributions of each addition. One was adding a pellet at a time. One even suggested using hop extract and a sophisticated Raspberry PI run machine that extruded a continuous hop drip. Needless to say, I may have in over my head...
I sat on the idea for a couple weeks, and did some more research into hop utilization and how it was affected by boil time. Utilization I found is a direct proportion to time: the longer the hop is boiled, the more alpha acids that are released into the wort, whereas later additions were lower in alpha acids and more for aromatics. Late hop additions didn't contribute a lot of bitterness, hence the popularity with adding a ton of hops toward the end (hop bursting/ hop stands).
So, could I continuously hop without imparting extreme bitterness? And what would my starting additions look like in comparison to my ending additions?
After researching a little more I found a formula online from Homebrewtalk.com user Rocketman768. This was a great tool for estimating total IBUs based on a continuous addition of hops.
K:=1.65*0.000125^(SG-1)*AA*1000/(4.15*V)
IBU_C= K*h*[1-1/(0.04*T)*(1-exp(-0.04*T))]
SG is specific gravity, AA is average alpha acid value in a percentage, V is the final volume in liters, H is the weight of hops in grams, and T is the time you are continually hopping.
By using this formula and programming it into a spreadsheet, I was able to play with the variables until I ended at a value I was comfortable with. With 2oz Centennial, 1oz Cascade, and 1oz Amarillo, I could end up with a total IBU of 68 for a 60 minute boil.

Recipe ingredients - featuring hops, hops, and more hops!
Now another question... knowing that bitterness derived from alpha acids is highly influenced by time, what would each addition need to look like so that I don't add too much too early?
The night before my brew day, I sat down to put a final hop schedule together. This beer would be done in time for my 30th birthday in early July, so I figured 30 hop additions would be a very poetic way to do my hop schedule. I would be adding hops every two minutes from start of boil to flame out, so I sat down with an individual IBU calculator and my hop selection.
Weighing hop pellets or pieces would not give me as precise a measurement as I needed, so taking some advice from a BYO article, I pulverized the hop pellets and mixed the powder of all three hops together. My thoughts on this were that I would be utilizing each of the hops unique characteristics for the entire boil, not just for bittering or aroma - each hop would be a star in this brew. I then calculated my 30 hop additions, each addition I wanted to be about 2.3 IBU, which meant that my early additions would be much smaller than my late addition. So I plugged in each addition and logged the IBU contribution of each using the average alpha acid content of my hop "mixture" as my guide for the IBUs (note: by mixing the hops it is hard to tell how much of any particular hop was in each addition, but I mixed as evenly as possible to give the best representation for each sample).
Brew day came, and I set up my 30 individual hop additions. I used small 4oz cups for each addition and marked each for time in the boil. I threw in my whirlfloc tab with my 10 min addition, and I started my mash. I didn’t do any water adjustments other than adding some KMET to rid the water of chloramine; the water for my area has a good amount of sulfates without gypsum additions, so I didn't bother to do anything additional.

Continuous hopping in thirty hop additions.
After I mashed out, I started my boil. I anticipated that hot break with a mix of excitement and trepidation, knowing I would be spending a while next to that kettle. The hot break came and went and I started my additions. Utilizing a timer with memory, I set it for 2 minute intervals, and began timing each addition. The brew went very smoothly, adding hops every time that alarm went off. I swear... I still hear it. Before I knew it, it was time to chill the wort and get it into the fermenter.

Boiling wort

My equipment setup

Racking to the carboy.
After I oxygenated the wort, I set my fermentation chamber to 64 degrees F and let the beer slide down to pitching temp. I read in my research that the yeast strain I was using would enhance citrus flavors at the lower end of the temperature range, so there it sat for two weeks of primary fermentation. On the morning of the 15th day, I headed out to the fermentation chamber dry hops in hand. I decided to use 1oz of each Citra and Simcoe, as I wanted that hop aroma - but didn’t necessarily want to smell it 20 feet away. I added my dry hops to the primary and buttoned it back up. The next seven days went by quickly, and I cold crashed the fermented beer on the last day of the week.

Happily fermenting beer
Bottling day was exciting, as I got to see the clarity of the finished product... as well as taste some of the uncarbonated greatness that was my first IPA. It had a decidedly citrus flavor, with hints of juicy pineapple. Sweetness was very prominent, but I knew that carbonation would subdue most of that.

Final gravity reading
Four weeks of bottle conditioning later, I cracked open my first bottle. It poured a dark copper, and a white velvety head was prominent in the glass... at least it carbonated well. I took my first whiff on the brew... hints of pine with the over arcing smell of fresh grapefruit! The first sip, sweet malts that turn to a pronounced hop bitterness, ending in a crisp hop bite at the end that lingered just long enough for you to take that next sip. The fullness of the hop profiles really came out. Flavors of oranges, grapefruit, and pineapple all meshed together harmoniously. It was balanced and smooth, just what I wanted. I felt like Dr. Frankenstein after giving his creation life. I lifted my glass proclaiming, "It's a Beer! It's a Beer!"

My IPA - it's a beer!
In a similar method, Jsmith82 from Homebrewtalk.com did a comparison on continuous hopping versus traditional hopping; the results of his experiment mirrored that of mine. By utilizing the hops throughout the boil, the hop flavor, aroma, and bitterness were all very balanced. It allowed each hop to show its bittering potential, its aromatics, and its flavor potency. This really solidified my views that hops aren't necessarily type cast as a certain type of boil addition, you can adjust times like many other attributes to serve your tastes. You can be a little crazy and make a complete monster, or make something delicate and smooth. After all, we are home brewers, we can afford to be curious!
I look forward to experimenting more with continuous hopping. I can change so many attributes that can widely change the character of my beers. I can add more additions, take away some, scale it up or down in overall IBU... the list goes on. If there is one thing I may do differently next time, it would be to enlist a few buddies to help me out with those hop additions! But for now, I reflect and look on to my next batch... maybe a Belgian Dubbel, maybe a Scottish Ale, maybe a continuously hopped Red Ale! It’s time to experiment!
Cheers,
Brian
Share this recipe on reddit
| Batch Size (gallons) | 5.5 | ||||||||||||||||||||||||||||||
| Efficiency | 75% | ||||||||||||||||||||||||||||||
| Recipe type | All Grain | ||||||||||||||||||||||||||||||
| Style | 14B. American IPA | ||||||||||||||||||||||||||||||
| Original Gravity | 1.069 | ||||||||||||||||||||||||||||||
| Final Gravity | 1.014 | ||||||||||||||||||||||||||||||
| ABV | 7.22% (basic) / 7.24% (advanced) [what's this?] | ||||||||||||||||||||||||||||||
| IBU | 68 | ||||||||||||||||||||||||||||||
| Color | 12.3 SRM | ||||||||||||||||||||||||||||||
| Boil Time | 60 min | ||||||||||||||||||||||||||||||
| Yeast | Wyeast 1272 (American Ale II) | ||||||||||||||||||||||||||||||
| Fermentables |
| ||||||||||||||||||||||||||||||
| Hops |
| ||||||||||||||||||||||||||||||
for complete recipe (with details like mash and fermentation temps), click here | |||||||||||||||||||||||||||||||
Permalink
Tags for this post: IPA, continuously, hopped, continuous, hops, beer, brewing


Please support BrewUnited by using our Amazon affiliate link when doing any shopping there - be it for homebrewing or for your regular shopping!
4 Comments
Any Questions? I'll be happy to answer any thing you may be curious about!
posted by Buxman14 on 6/19/2015 at 05:55:07 PM
Excellent write up, and that beer looks amazing! I might have to try this approach sometime. Question - how did you crush up the hops, just smoosh 'em with a rolling pin or something?
posted by MrDustpan on 7/13/2015 at 02:54:06 PM
To crush up the good I used a mortar and pestle, however a rolling pin or mallet could work as well. I found using the mortar and pestle gave me a more uniform crush so it blended better! Cheers!
posted by Buxman14 on 7/16/2015 at 11:38:48 AM
To crush up the hops I used a mortar and pestle, however a rolling pin or mallet could work as well. I found using the mortar and pestle gave me a more uniform crush so it blended better! Cheers!
posted by Buxman14 on 7/16/2015 at 11:39:40 AM
