Decoction Mashing: Taste the Magic
Centuries ago, brewers did not have access to the well modified malts that we take for granted today, making it difficult to extract all of those delicious sugars from the malt. In addition, specialty malts simply did not exist... at least not to the degree that we think of in modern brewing. In the interest of creating more flavorful brews (and of the brewers getting as much bang for their buck as possible), the technique of decoction mashing came to be.
Of course, a lot has changed since that time. Today, the malts we used are, by default, well-modified. We have access to a veritable rainbow of specialty malts, with new varieties regularly coming to market. So, why then would anyone even bother with the Old World tradition of a decoction mash in today's environment? Surely our quality malts mean that that there is no need for complex processes, and our wide variety of malts mean that to achieve almost any flavor, one can just grab a pound of this, a few ounces of that?
Indeed, this is one of those nigh-religious debates in homebrewing. Some brewers will tell you that there just is no point in employing a decoction, that you can achieve an identical beer with a little melanoiden malt. Others hold that there is something special in a decocted beer, some little touch of magic that you just can't perfectly duplicate in any other way.
It probably comes as no surprise that I fall into the latter camp. Understand, I love melanoiden malt; I feel like it can add a lot to almost any beer where maltiness is desired. However, I also believe that decoction does something that you just cannot exactly replicate with any mere specialty malt. That being said, the purpose of this article (tongue in cheek title aside) is not to try to convince you either way; rather, my intention is to simply walk you through the process of a decoction mash, if you are so inclined to perform one.
If you do a Google search for decoction mashing, you'll likely turn up all sorts of technical results that use lots of big, intimidating words - which have the end result of scaring a lot of homebrewers away from the technique. I love to geek out about this hobby, and do all sorts of "homework" on various processes and approaches... and it still took me weeks to convince myself that I had a good enough grasp on the fundamentals of decoction mashing to even try it. Now that I have several decoction mashes under my belt, I've come to understand that it seriously is not that complicated.
Most homebrewers are well acquainted with the most common type of mash there is - the single infusion mash. In a single infusion, you add (infuse) a calculated amount of hot water once, which raises your grain to the proper mash temperature for a sacchrification rest (which is the process by which the sugars in the malt are exposed to enzymatic activity, resulting in a fermentable wort). You simply hold your mash at that single temperature for the duration of the process (most often, an hour), at which point you lauter (drain off the wort), and optionally sparge to collect additional sugars.
A typical single infusion mash schedule might look something like this:
In a decoction mash, you start with an infusion of hot water, but it is typically done at a much lower temperature than in a single infusion mash. Your first step is usually done at a much cooler temperature - typically, this is a protein or acid rest - after which a portion of the mash is drawn off into another vessel (most often, your brew kettle or some other pot - I use my six gallon HLT for this). This portion - called the decoction - is heated to saccharification rest temperature and held there long enough for this portion of the mash to complete starch conversion. Once that is completed, the decoction is heated to boiling temperature, where it will be held for five to forty-five minutes - depending on just how much flavor and color you are wanting to add to your beer.
The boiling decoction is then added back to the main mash, which raises the main mash up to your target saccharification rest temperature. You would then either proceed as normal with a single infusion mash, or perhaps pull another decoction for the purpose of raising the main mash to a warmer saccharification rest temperature.
A typical double decoction mash schedule might look something like this:
Congratulations, you now see the biggest drawback to a decoction - it is both time and labor intensive, at least compared to a single infusion mash... though really, it's not the effort so much as the lengthening of your brewday that can be the killer. You can, of course, shorten the process by doing a single decoction - or you can stretch it out by going into full tradition mode and doing a triple decoction. I find that a double decoction is a nice balance of the two; you can get tons of flavor and color contributions from it, but after two decoctions, don't be surprised if you are getting ready to end the brewday.
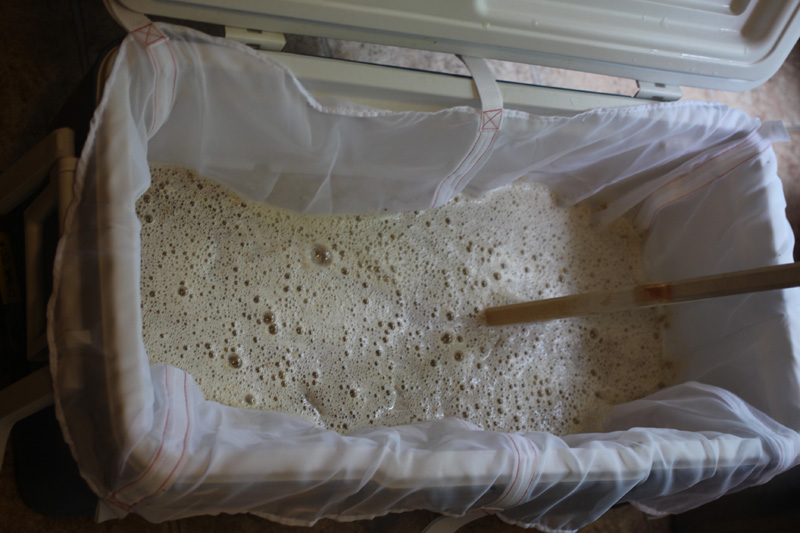
Doughed in, using by sweet Brew Bag to line the cooler (click the pic for my review of the Brew Bag)
A few items to consider when decocting:
For best results, you'll want to mash a little thinner than you may be accustomed to; 1.5-2 quarts per pound of grain is a pretty ideal target.
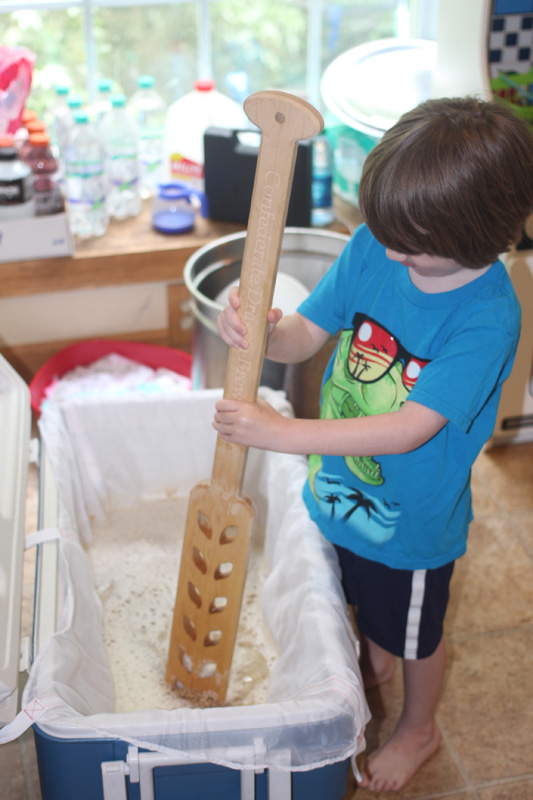
Stirring prior to pulling the firect decoction. (optional brewing buddy shown)
When pulling your decoctions, you want to pull a very thick portion - i.e. heavy on the grain (somewhere around 1 quart of water per pound of grain). You want enough liquid to cover your grains, as you don't want to scorch the decoction, but the more grain you get, the more delicious melanoidens you'll extract. Also, a thick decoction is more efficient at warming your main mash up to the target step temperature.
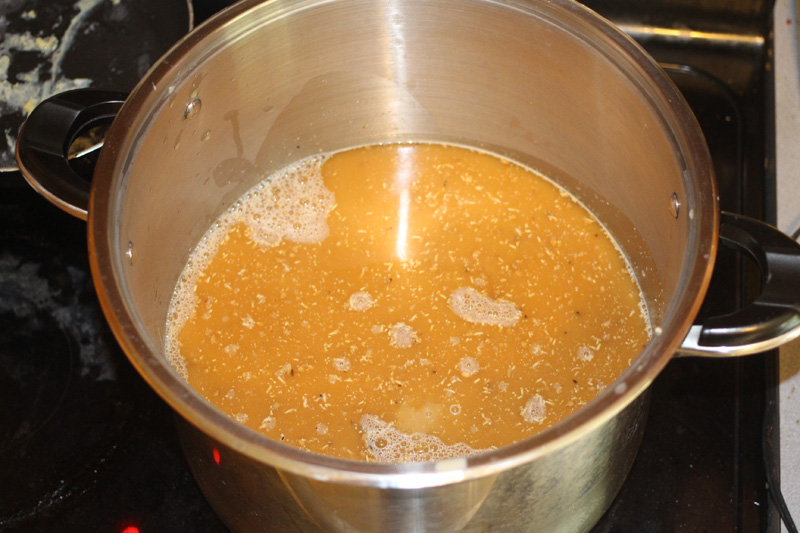
My first decoction, pre boil.
You may be tempted to skimp on the saccharification rest for the decoction, but be very careful of doing so - especially in batches with lots of grains lower or absent in diastatic power (such as roasted malts). Decoction does help to make those startches more readily accessible to your mash enzymes... but if you denature those enzymes by heating them up too quickly, you may harm the overall fermentability of your wort.
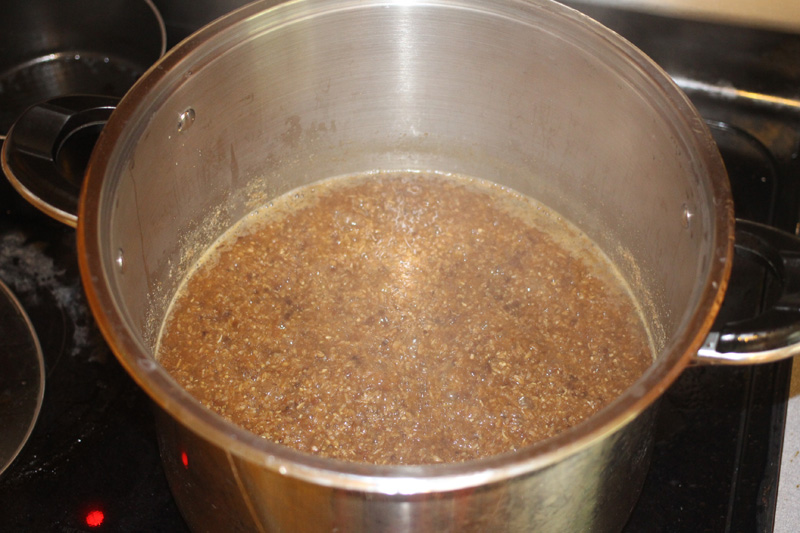
My second decoction, just about to boil. Taste that beautiful color!
That said, if you "follow the rules", so to speak, expect to see a bump in efficiency if you decoct - even if you are using well-modified malts. I don't think I have ever overshot my target gravity in a decoction by less than four points.
The exact step temp for the decoction isn't as important as it is for the main mash; you will frequently see this on the higher end of saccharification rest range (say, 155 F - 162 F).
Feel free to heat (and even boil) your decoction with the lid on. The heating process will be faster, you'll cut down on evaporation losses, and any possible DMS will be handled during the main boil, anyway.
When adding your decoction back to the main mash, dump around three quarters of your volume in, stir like crazy, then check your temperature. If you're high, you can stir to dissipate the heat. If you're on target, you can simply hold the main mash where you are (and add the remainder of the decoction back once it has cooled to the target main mash temperature). If you're low, you add the rest of the decoction to further raise the main mash temperature.
How do you figure out how large of a decoction to pull? Beersmith does this for you, and I'm sure that other software will do that same. Troester offers the following formula:
With that in mind, know that I have never, ever pulled more decoction than I needed. I keep thinking that I'm overestimating, and I keep either exactly hitting my step temps - or somewhat undershooting them. Your mileage, of course, may vary.
A few steps that you may want to include in your schedule:
Acid rest (optional) - the coolest step, temperature wise, that you might employ. A typical temperature for this step is around 102 degrees F. You can make your pH adjustments freely at this temperarure range without having to worry about rushing to the nest step, as it is still too cool for any enzymatic activity to take place.
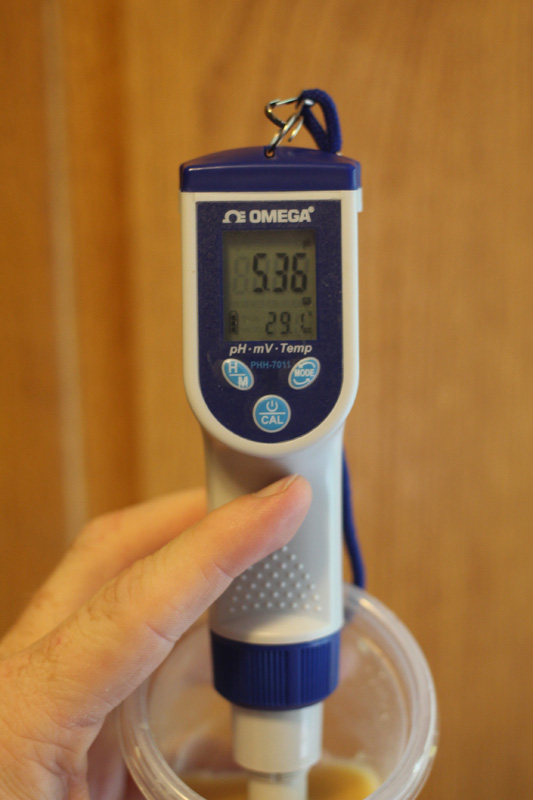
Target pH for this batch was 5.34; I was within .02 of the target with no modifications, thanks to Bru'n Water. (click pic for a great Bru'n Water primer)
Protein rest (optional) - used to create clearer beer. A typical temperature for this step is around 122 degrees F. The purpose of this step is to help break down haze-causing proteins, but in well-modified malts, it can do more harm than good; reports of beers with zero head formation and/or retention are pretty commonplace. If you choose to do a protein rest, you may want to keep it rather brief (I personally shoot for ten minutes at this step).
Saccharification rest - this is, of course, where your sugars are broken down by enzymes to make them digestible by your yeast. The typical temperature range for this step is 144 degrees F up to 162 degrees F, with the majority using temperatures in the 148 degrees F to 156 degrees F range. Cooler temps lead to a thinner, more alcoholic beer, while warmer temps lead to a fuller-bodied, less alcoholic beer.
Mash out (optional) - used to denature your enzymes and stop sugar conversion. A typical temperature for this step is 168 degrees F. This step is usually omitted by batch spargers, but fly spargers may employ it, especially in fuller bodied beers. Otherwise, conversion can still go on during the long fly sparge process, which can end up in a lower bodied wort than the brewer intended due to the natural decrease in mash temperature.
I won't even try to sugarcoat it; decoction mashing will easily add a couple of hours onto a given brewday. While it's not terribly labor intensive, you can't just walk away while the process is going on (ask the scorched grains on the inside of my HLT about this). While decoction mashing absolutely makes a noticeable impact to your beer in terms of both flavor and color, it's true that judicious use of speciality grains can certainly have a similar impact. And, of course, even once the decoction mash is done, you still have the rest of your brewday to go - boil, chill, cleanup, etc.
So, again, why bother?
Decoction mashing clearly isn't for everyone, and it's not appropriate for every style of beer. If you have a beer where you'd like to increase the depth and complexity of your malt flavors - or, if you (like me) find attraction in the history and craft of brewing - then decoction mashing may be a technique that you will enjoy.

My littlest brewing buddy ("Home Brewed" onesie depicted)
If you'd like to learn more about decoction mashing, be sure to check out Kai Troester's excellent resource material on the subject.
Permalink
Tags for this post: decoction, mash, mashing, tradition, melanoiden, brewing, beer
3 Comments
You're right - it isn't "necessary" to do a decoction nowadays. It also isn't "necessary" to eat icecream. We do it because it's freaking awesome, not 'cause we have to.
Those smells from decoction tho. Yum.
posted by toklas on 7/20/2015 at 09:57:26 PM
Good article
One way to keep the Protein Rest short is to start at 102F pull enough decoction volume to infuse twice (about 60%) heat and rest at 156 and then boil as you say but in two pots infuse one part of that to get to 122, the other will be ready to add 10 minutes later, rest for 60 until conversion and then decoct liquid/boil to get to 168F. I batch sparge so this may be unnecessary for me if I just lauter and then batch sparge. Recently I began experimenting with starting the infusion at 144 and then decocting to get to 156 to shorten the day but am not convinced of the results.
posted by BeerBaronBob on 7/20/2015 at 09:57:48 PM
lol @ awesome. I agree, Toklas.
Interesting idea, BeerBaronBob. Maybe I should look into this.
posted by homebrewdad on 7/20/2015 at 11:12:55 PM
Of course, a lot has changed since that time. Today, the malts we used are, by default, well-modified. We have access to a veritable rainbow of specialty malts, with new varieties regularly coming to market. So, why then would anyone even bother with the Old World tradition of a decoction mash in today's environment? Surely our quality malts mean that that there is no need for complex processes, and our wide variety of malts mean that to achieve almost any flavor, one can just grab a pound of this, a few ounces of that?
Indeed, this is one of those nigh-religious debates in homebrewing. Some brewers will tell you that there just is no point in employing a decoction, that you can achieve an identical beer with a little melanoiden malt. Others hold that there is something special in a decocted beer, some little touch of magic that you just can't perfectly duplicate in any other way.
It probably comes as no surprise that I fall into the latter camp. Understand, I love melanoiden malt; I feel like it can add a lot to almost any beer where maltiness is desired. However, I also believe that decoction does something that you just cannot exactly replicate with any mere specialty malt. That being said, the purpose of this article (tongue in cheek title aside) is not to try to convince you either way; rather, my intention is to simply walk you through the process of a decoction mash, if you are so inclined to perform one.
If you do a Google search for decoction mashing, you'll likely turn up all sorts of technical results that use lots of big, intimidating words - which have the end result of scaring a lot of homebrewers away from the technique. I love to geek out about this hobby, and do all sorts of "homework" on various processes and approaches... and it still took me weeks to convince myself that I had a good enough grasp on the fundamentals of decoction mashing to even try it. Now that I have several decoction mashes under my belt, I've come to understand that it seriously is not that complicated.
Most homebrewers are well acquainted with the most common type of mash there is - the single infusion mash. In a single infusion, you add (infuse) a calculated amount of hot water once, which raises your grain to the proper mash temperature for a sacchrification rest (which is the process by which the sugars in the malt are exposed to enzymatic activity, resulting in a fermentable wort). You simply hold your mash at that single temperature for the duration of the process (most often, an hour), at which point you lauter (drain off the wort), and optionally sparge to collect additional sugars.
A typical single infusion mash schedule might look something like this:
- Mash in with 20 quarts of 161 degree F water
- Hold mash at 150 degrees F for 60 minutes (saccharification rest)
- Lauter, then sparge with 22 quarts of 168 degree water
In a decoction mash, you start with an infusion of hot water, but it is typically done at a much lower temperature than in a single infusion mash. Your first step is usually done at a much cooler temperature - typically, this is a protein or acid rest - after which a portion of the mash is drawn off into another vessel (most often, your brew kettle or some other pot - I use my six gallon HLT for this). This portion - called the decoction - is heated to saccharification rest temperature and held there long enough for this portion of the mash to complete starch conversion. Once that is completed, the decoction is heated to boiling temperature, where it will be held for five to forty-five minutes - depending on just how much flavor and color you are wanting to add to your beer.
The boiling decoction is then added back to the main mash, which raises the main mash up to your target saccharification rest temperature. You would then either proceed as normal with a single infusion mash, or perhaps pull another decoction for the purpose of raising the main mash to a warmer saccharification rest temperature.
A typical double decoction mash schedule might look something like this:
- Mash in with 20 quarts of 128 degree F water
- Hold mash at 122 degrees F for 20 minutes (protein rest)
- Pull 10 quart decoction, warm to 155 degrees F
- Hold decoction at 155 degrees F for 30 minutes (saccharification rest)
- Boil decoction for 25 minutes
- Add decoction back to main mash, raising temp to 147 degrees F
- Hold main mash at 147 degrees F for 20 minutes (saccharification rest)
- Pull 8 quart decoction, warm to boiling
- Boil decoction for 20 minutes
- Add decoction back to main mash, raising temp to 156 degrees F
- Hold mash at 156 degrees F for 30 minutes (saccharification rest)
- Lauter, then sparge with 19 quarts of 168 degree water
Congratulations, you now see the biggest drawback to a decoction - it is both time and labor intensive, at least compared to a single infusion mash... though really, it's not the effort so much as the lengthening of your brewday that can be the killer. You can, of course, shorten the process by doing a single decoction - or you can stretch it out by going into full tradition mode and doing a triple decoction. I find that a double decoction is a nice balance of the two; you can get tons of flavor and color contributions from it, but after two decoctions, don't be surprised if you are getting ready to end the brewday.

Doughed in, using by sweet Brew Bag to line the cooler (click the pic for my review of the Brew Bag)
A few items to consider when decocting:
For best results, you'll want to mash a little thinner than you may be accustomed to; 1.5-2 quarts per pound of grain is a pretty ideal target.

Stirring prior to pulling the firect decoction. (optional brewing buddy shown)
When pulling your decoctions, you want to pull a very thick portion - i.e. heavy on the grain (somewhere around 1 quart of water per pound of grain). You want enough liquid to cover your grains, as you don't want to scorch the decoction, but the more grain you get, the more delicious melanoidens you'll extract. Also, a thick decoction is more efficient at warming your main mash up to the target step temperature.

My first decoction, pre boil.
You may be tempted to skimp on the saccharification rest for the decoction, but be very careful of doing so - especially in batches with lots of grains lower or absent in diastatic power (such as roasted malts). Decoction does help to make those startches more readily accessible to your mash enzymes... but if you denature those enzymes by heating them up too quickly, you may harm the overall fermentability of your wort.

My second decoction, just about to boil. Taste that beautiful color!
That said, if you "follow the rules", so to speak, expect to see a bump in efficiency if you decoct - even if you are using well-modified malts. I don't think I have ever overshot my target gravity in a decoction by less than four points.
The exact step temp for the decoction isn't as important as it is for the main mash; you will frequently see this on the higher end of saccharification rest range (say, 155 F - 162 F).
Feel free to heat (and even boil) your decoction with the lid on. The heating process will be faster, you'll cut down on evaporation losses, and any possible DMS will be handled during the main boil, anyway.
When adding your decoction back to the main mash, dump around three quarters of your volume in, stir like crazy, then check your temperature. If you're high, you can stir to dissipate the heat. If you're on target, you can simply hold the main mash where you are (and add the remainder of the decoction back once it has cooled to the target main mash temperature). If you're low, you add the rest of the decoction to further raise the main mash temperature.
How do you figure out how large of a decoction to pull? Beersmith does this for you, and I'm sure that other software will do that same. Troester offers the following formula:
decoction volume = total mash volume * (target temp - start temp) / (boil temp - start temp)
Then, add 15%-20% to account for potential evaporation loss, cooling of the main mash during, etc.
With that in mind, know that I have never, ever pulled more decoction than I needed. I keep thinking that I'm overestimating, and I keep either exactly hitting my step temps - or somewhat undershooting them. Your mileage, of course, may vary.
A few steps that you may want to include in your schedule:
Acid rest (optional) - the coolest step, temperature wise, that you might employ. A typical temperature for this step is around 102 degrees F. You can make your pH adjustments freely at this temperarure range without having to worry about rushing to the nest step, as it is still too cool for any enzymatic activity to take place.

Target pH for this batch was 5.34; I was within .02 of the target with no modifications, thanks to Bru'n Water. (click pic for a great Bru'n Water primer)
Protein rest (optional) - used to create clearer beer. A typical temperature for this step is around 122 degrees F. The purpose of this step is to help break down haze-causing proteins, but in well-modified malts, it can do more harm than good; reports of beers with zero head formation and/or retention are pretty commonplace. If you choose to do a protein rest, you may want to keep it rather brief (I personally shoot for ten minutes at this step).
Saccharification rest - this is, of course, where your sugars are broken down by enzymes to make them digestible by your yeast. The typical temperature range for this step is 144 degrees F up to 162 degrees F, with the majority using temperatures in the 148 degrees F to 156 degrees F range. Cooler temps lead to a thinner, more alcoholic beer, while warmer temps lead to a fuller-bodied, less alcoholic beer.
Mash out (optional) - used to denature your enzymes and stop sugar conversion. A typical temperature for this step is 168 degrees F. This step is usually omitted by batch spargers, but fly spargers may employ it, especially in fuller bodied beers. Otherwise, conversion can still go on during the long fly sparge process, which can end up in a lower bodied wort than the brewer intended due to the natural decrease in mash temperature.
I won't even try to sugarcoat it; decoction mashing will easily add a couple of hours onto a given brewday. While it's not terribly labor intensive, you can't just walk away while the process is going on (ask the scorched grains on the inside of my HLT about this). While decoction mashing absolutely makes a noticeable impact to your beer in terms of both flavor and color, it's true that judicious use of speciality grains can certainly have a similar impact. And, of course, even once the decoction mash is done, you still have the rest of your brewday to go - boil, chill, cleanup, etc.
So, again, why bother?
Decoction mashing clearly isn't for everyone, and it's not appropriate for every style of beer. If you have a beer where you'd like to increase the depth and complexity of your malt flavors - or, if you (like me) find attraction in the history and craft of brewing - then decoction mashing may be a technique that you will enjoy.

My littlest brewing buddy ("Home Brewed" onesie depicted)
If you'd like to learn more about decoction mashing, be sure to check out Kai Troester's excellent resource material on the subject.
Permalink
Tags for this post: decoction, mash, mashing, tradition, melanoiden, brewing, beer


Please support BrewUnited by using our Amazon affiliate link when doing any shopping there - be it for homebrewing or for your regular shopping!
3 Comments
You're right - it isn't "necessary" to do a decoction nowadays. It also isn't "necessary" to eat icecream. We do it because it's freaking awesome, not 'cause we have to.
Those smells from decoction tho. Yum.
posted by toklas on 7/20/2015 at 09:57:26 PM
Good article
One way to keep the Protein Rest short is to start at 102F pull enough decoction volume to infuse twice (about 60%) heat and rest at 156 and then boil as you say but in two pots infuse one part of that to get to 122, the other will be ready to add 10 minutes later, rest for 60 until conversion and then decoct liquid/boil to get to 168F. I batch sparge so this may be unnecessary for me if I just lauter and then batch sparge. Recently I began experimenting with starting the infusion at 144 and then decocting to get to 156 to shorten the day but am not convinced of the results.
posted by BeerBaronBob on 7/20/2015 at 09:57:48 PM
lol @ awesome. I agree, Toklas.
Interesting idea, BeerBaronBob. Maybe I should look into this.
posted by homebrewdad on 7/20/2015 at 11:12:55 PM

